Webinar with EY: Data Insights from Virtual Events

Virtual Events 2.0: Responsive Tactics to MarComms Strategy:
This article covers how to set up a live stream on the latest version of Glisser. For an in depth guide on setting up Glisser’s own streaming services, you can go to –
Setting up a Glisser Conference Call: https://www.glisser.com/support/setting-up-a-glisser-stream-video-conference/
Setting up a Glisser Broadcast: https://www.glisser.com/support/setting-up-a-glisser-stream-broadcast/
Click into your event/session that you’d like to add a livestream broadcast/ web conference to and Click edit.
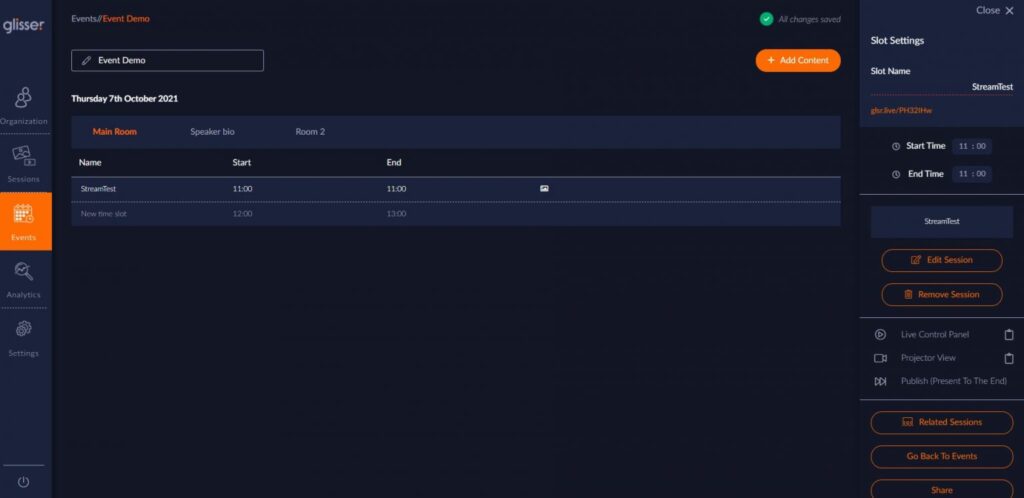
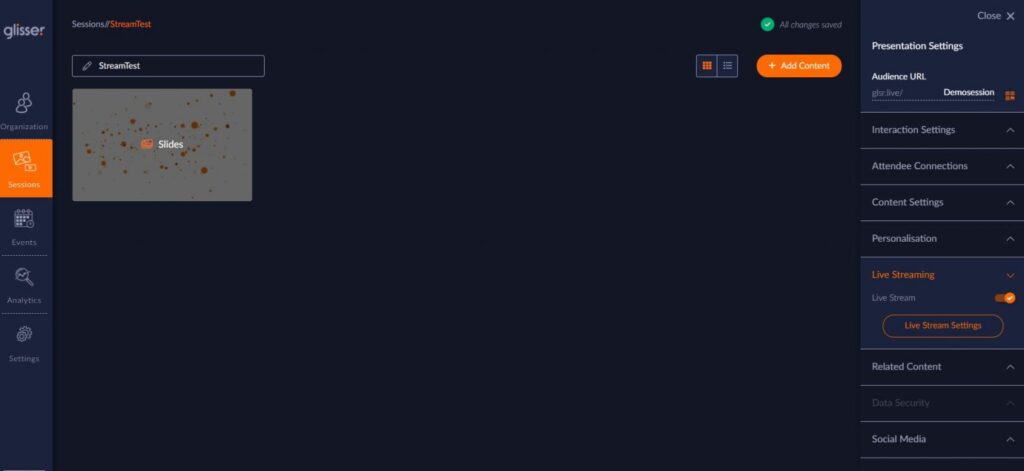
Open up the ‘Live Streaming option on the right hand side of the screen and click ‘Live Stream settings
A new tab overlay will open up, prompting you to set up your stream. For a smaller (up to roughly 40 member) conference calls, select the option ‘Video Conference’. For larger events in which the audience will primarily be made up of passive viewers, select the ‘Live Broadcast’ option.
Once you’ve selected your option, click on the drop down menu of ‘Sources’ below. The most suitable options will be available based on whether you chose a video conference or live broadcast. From here you can choose to set up your Glisser stream, or select your preferred video platform.
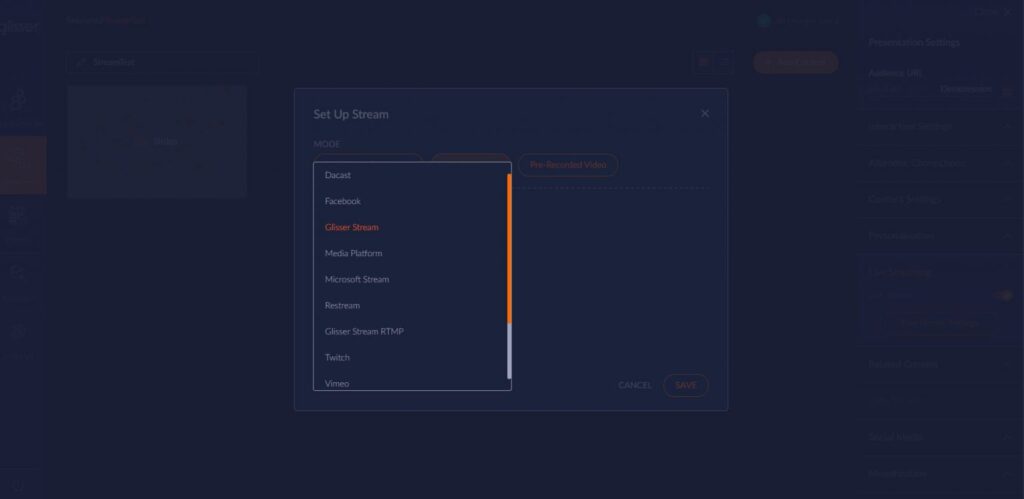
Once you’ve selected your platform, enter the required information for it to be embedded into Glisser. The set up box will indicate what information is needed (e.g. the stream URL is required for youtube streaming)
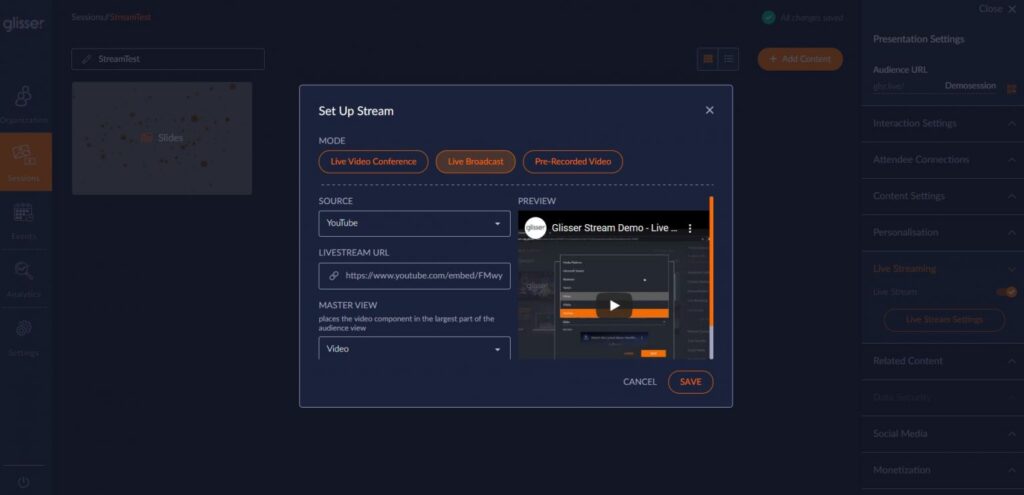
To decide if you want the live screen feed to fill the largest part of the audience screen (As opposed to any slides) choose whether or not you would like it as the ‘Master View’
Once completed, click save and close the session
Once your streaming is set up, you can preview how it looks by clicking ‘Live Control’. You can open this in a new tab by clicking the arrow on the far right hand side. To send a moderation link to other presenters, click on the clipboard icon. This will automatically copy a URL that can be pasted into your browser

This will open a new window, with a large screen showing whatever is being live streamed. At this point, the audience can not yet see this so you can consider this as a Green Room area.
Once everyone is Comfortable, push ‘Go Live’ on the bottom right hand corner of the screen. This will trigger the session to begin, and the live stream will be broadcasted to the audience. If you have selected ‘Video Conference’, then this will also make the call available for viewers to join
(Note: You can also upload pre-recorded videos to play in the live stream area)
Clicking ‘Go Live’ will also change moderator view so that any uploaded slides will become visible. If you’d like to move the video stream to make the slides more visible, then you can click on the Camera icon at the bottom of the screen. Each click will change the size and position of the video stream (These changes will only be visible on your own screen)
Once the session has finished, click ‘End’ at the bottom right of the screen. This will end the session for the audience, and will take you back to original page view, not featuring the slides
For more information on how you can use Glisser to increase attendance and reduce cost per attendee, please