June 30 Webinar: Crafting the Ultimate RFP for your Webinar

June 30 Webinar: Crafting the Ultimate RFP for your Webinar
With Glisser you have the ability to create a slide deck presentation or an event with multiple sessions. This article will show you how to create your event.
The first thing you need to have in mind is the structure of your event. Some questions you might want to consider to create your event are:
With an idea of how you want your event to look, you will be able to start creating your event.
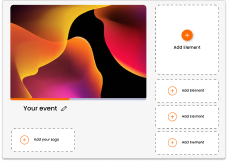
Go to the right top corner and click on Add Event > Create New. A window will pop up where you will be able to add:

Note: that these can be modified later on within the event.
Once you are happy with your structure, click on Create Event, and you will have the structure for your event created!
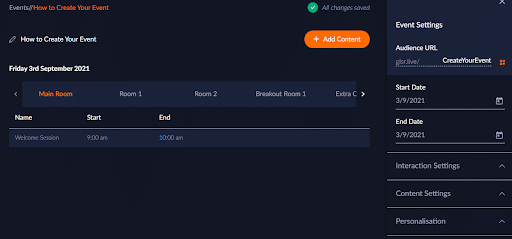
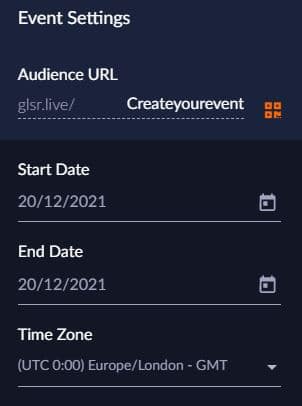
Once you have the structure of the event, you’ll be able to set up its settings. These can be found on the right-hand side of your Glisser screen.
Please note that these settings will affect all the sessions within the event - the sessions can be modified individually.
Here you will be able to change the Audience URL, as well as the Start and End dates and Time Zone.
Note: If your audience is joining from a different time zone, the agenda will automatically update to show in their local time. Your audience can change this by clicking on the hamburger icon in the top left of the lobby page, once they’ve logged in, and selecting a new time zone from the drop-down.
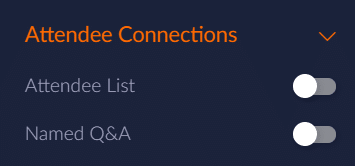
With these settings, you will define how can the audience interact with your event.

Allow attendees to view each other’s profiles and connect with one another in their own time. Additionally, delegates can decide whether they would like their name to appear by their questions or if they would like to remain anonymous.
Define the accessibility and management of the content with the below settings:

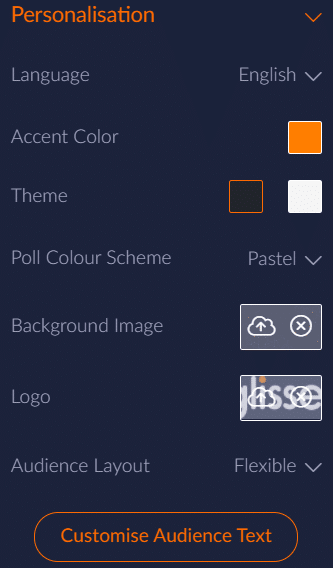
Through a series of settings, you can personalise your presentation to match your brand or event. To edit your chosen event, select Personalization from the right-hand sidebar of your Glisser dashboard.
Please see visit this link for more information about Personalisation. On this settings section you will have the below tabs to customize your event:
When handling client data, security is of great importance, and Glisser provides multiple layers of it.
Under Data Security, the presenter will see these options listed:
Please see visit this link for more information about our Data Security options.
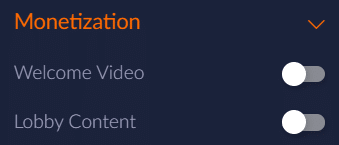
With the monetization options, Glisser allows you to generate revenue from your events when creating your event. Glisser can offer opportunities for sponsors to upload videos, images and hyperlinks to appear in the Waiting Room or Lobby Area within events and individual sessions. This raises valuable sponsor awareness to a captive and targeted audience alongside driving traffic to a specified URL.
Glisser offers the opportunity to add:
Find out more about Monetization following this link.
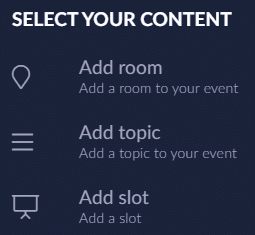
Once the event structure and settings are added to create your event, it’s time to add content to our event!
Start by revising and adding any extra sessions and on-demand content sessions if needed. We will do this by clicking on the Add Content button on the top right corner. From the drop-down select Add Room, Add Topic or Add Slot accordingly.
When selecting a session, you will be able to add content to it by clicking on Upload Session on the right-hand side panel. Here you will be able to upload your session’s content.
For more information about how to upload and modify your slide deck presentation, please follow this link.
For more information on how you can use Glisser to increase attendance and reduce cost per attendee, please