Glisser Stream is our very own streaming solution. Glisser Stream enables you to broadcast a stream (host a one way stream similar to Vimeo and Youtube), or host a video conference (a two way stream ideal for breakout sessions).
Live Broadcast
Within your session, click on Live Streaming and turn on the toggle.
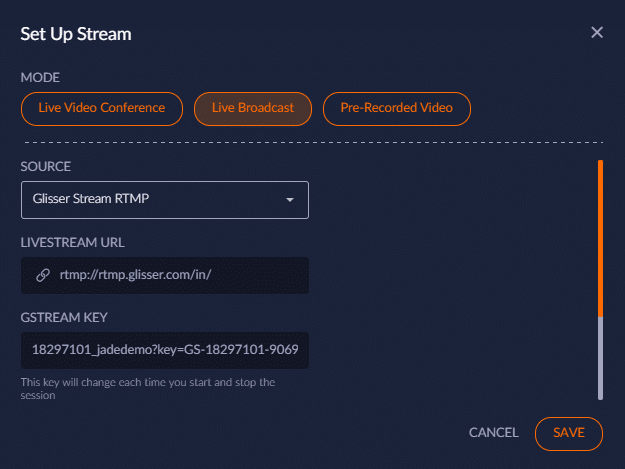
Once you turn on the toggle, a pop up will appear. Here you must select LIVE BROADCAST. From the sources drop down, you will need to select Glisser Stream.
Click on SAVE
Glisser Stream RTMP
This will allow video production companies into Glisser Stream without the need for third party integration.
Simply share the Live Stream URL & the GStream Key with your production company.
Select your MASTER VIEW and click on SAVE.
Video places the video component in the largest part of the screen
Slides places the slides in the largest part of the audience view
Please note that the GStream Key will change each time you start/stop a session.
Going Live
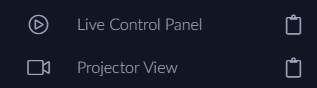
After setting up a Glisser Stream broadcast, click on Live Control Panel to open the Live Control Presenter Green Room. To share the Live Control link with any speakers or hosts you may click on the clipboard image. This will copy a link which can be shared.
You will be taken to the lobby which looks similar to the below. Here you can turn on your microphone or camera and welcome any of your speakers who may be joining ahead of the delegates. If your camera is not on then it will display your initial(s).
To share the Live Control link with any speakers or hosts you may click on the Copy Link icon. This will copy a link which can be shared.
If all presenters are using the same link to log in, you will all be given the same name. To change this, each individual will need to click on their name, and type in the name they want to have showing when in the lobby area, before going live.
At the bottom of the video screen there are a number of icons you can click on: Mute/Unmute, Start/Stop Video, Share Screen, Open Chat, Raise Hand/Emojis, Toggle Tile View, Full Screen and Change Background
To view the full SETTINGS, Click the white “Raise Hand” icon shown above, and then click the Yellow Hand at the top of the screen. This will then show you all Participants in the Broadcast in the right-hand side panel.
In the side panel, you can mute the participants’ microphones, disable their cameras, kick them from the room, or private message them.
If you click on the three dots in the bottom right, you can access the Moderation Controls and general Settings (such as Device settings, Profile and Notification Sounds).
“Everyone Follows Me” means you can then set the broadcast up so that delegates will automatically follow your view - between speaker and panel view for example. You will also have the ability to ensure that speakers join muted or with their camera off.
To start the broadcast you click on START BROADCAST and a voice will signal that the broadcast has started. You can then click on GO LIVE. The stream will start and will take you to the Live Control screen.
Within the Live Control page you can present your slides and polls, manage any Q&A, and also view the current live stream.
To change your view of the stream, you click on Toggle Tile View image to display panel view. This affects your view only, your speakers will have the ability to amend the view for their own screen.
When you are ready to end the session, you must click on END SESSION and then confirm the action. You will then be taken back to the Live Control Presenter Green Room. You then need to click STOP BROADCAST.
To head back to your session/event dashboard you may click on the arrow displayed in the top left corner of your screen.
Live Control Symbols
Here are the symbols displayed in the live control panel and what they do when setting up a Glisser Stream broadcast.
Session Duration: This shows you how long your session has been live for.
Keyboard Help: This will display the hotkeys which are used when presenting. You must click on this a second time to take the hotkeys down.
Lead View: This will display the slide deck and polls in full screen mode.
Projector View: This will open the projector view in a second tab. This is ideal for relay screens.
Camera Icon - Stream Overlay Position: This will rearrange your stream so that it is placed in a suitable position for you.
Live Control Link: This allows you to copy the live control link and share with a host, speaker, or a member of your team who needs access to the live control screen.
END SESSION: This will end your current session so it is no longer live.
Top Tips
Firewall
If you or your speakers are receiving a ‘lost’ connection when turning on your camera/audio then this means that the firewall is blocking access to Glisser Stream. This can be easily resolved by your IT department by ensuring that you have access to the UDP port 10,000.
A ‘lost’ connection could also occur due to your company VPN. Please ensure that you turn off your VPN connection.
If you are unable to follow our steps above, please use a personal device as this will have fewer restrictions.
Sound quality
When both audio and camera are being accessed this uses more bandwidth. Therefore, it is recommended that you connect to a hardline.
If you are in an open environment that is prone to audio feedback and echoes then you should wear headphones. If you don’t have headphones, then lowering the volume of your device may help. (Remember, sound reflects on walls so some individuals will have better audio than others based on their surroundings).
Each speaker can reduce their call quality within Glisser Stream.
When you are not speaking, mute yourself!
Broadcast Recordings
Glisser Stream Broadcast recordings can be accessed from within your Glisser account under Analytics then Video.
How increase attendance and reduce cost per attendee?
For more information on how you can use Glisser to increase attendance and reduce cost per attendee, please