June 30 Webinar: Crafting the Ultimate RFP for your Webinar

June 30 Webinar: Crafting the Ultimate RFP for your Webinar

Book a Demo

You are able to add up to three links to be displayed for each session. This is a great place to include additional content such as downloadable documents, speakers linkedin profiles/emails and links to external meetings that you may want to be hosted outside of Glisser.

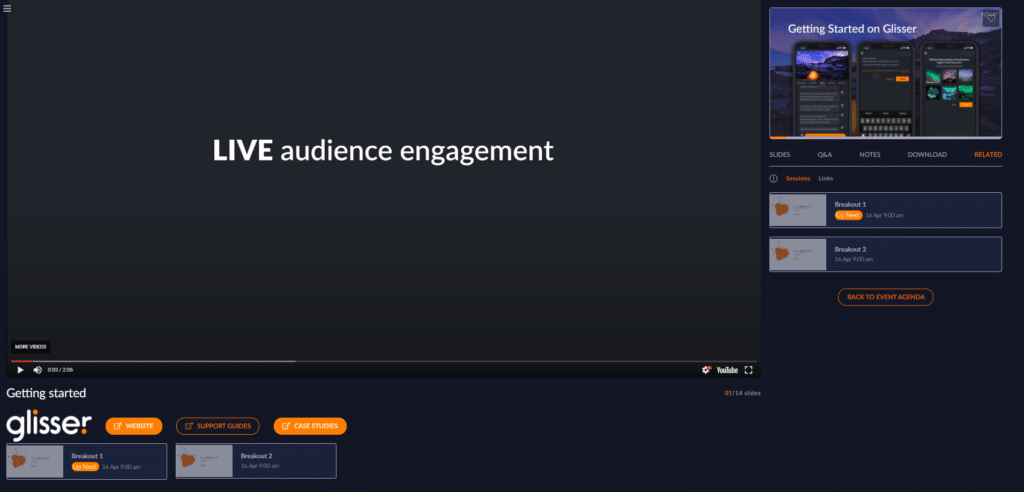
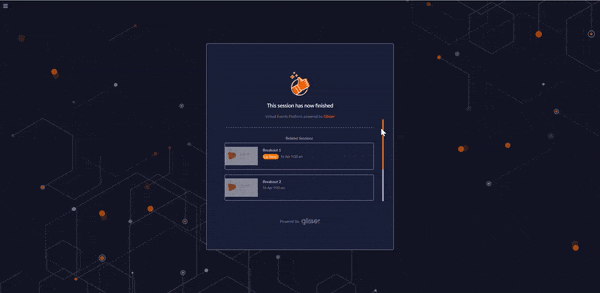
When a session is live related links will appear in three places in the Audience view:

  • Displayed beneath the main window to the right of the logo.
  • Displayed in the related tab.
  • Displayed on an overlay at the end of the Session (you must release the final Glisser slide in order for this to appear).

To add a related link all you need to do is follow the steps below:

  • Click on Related Content within a session and turn on the links toggle.
  • Click on EDIT LINKS.
  • Add in your label text and copy in the web address (the web address will need to be 300 characters or shorter).
  • Choose whether you want the text to be Contained or Outlined.
  • Click on SAVE.

Tip: You can add an email as a related link. Please use this format mailto:EMAIL

Related Sessions can only be used within the event structure.

You can add up to 5 links to other sessions that an attendee may find useful and is a great method to direct delegates to upcoming sessions.
When a session is live related sessions will appear in three places in the Audience view:

  • Displayed beneath the main window underneath the logo and the related links.
  • Displayed in the related tab.
  • Displayed on an overlay at the end of the session, once you have clicked the End Session button. If a delegate clicks on a related session, they will be taken directly to the session, passing the event agenda. This does not appear if the ‘Publish (Present To The End)’ option was used for the session.

If you are running an event, as opposed to a single session, the next session in your event agenda will automatically appear when the current session ends as well as you’re related links and sessions as outlined below. 

To add a related session all you need to do is follow the steps below:

  • You must click on RELATED SESSIONS.
  • You can then select up to five related sessions from within the same event to link to a particular session
  • Click on SAVE.

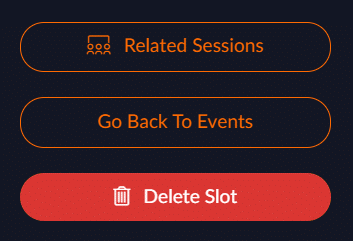
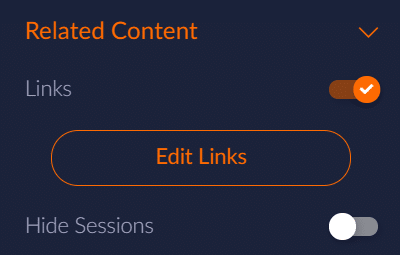
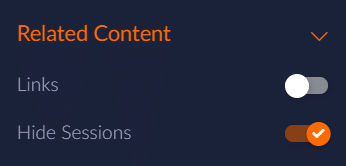
If you do not want related sessions to appear then follow these steps below:

  • Click on Edit Session then Related Content.
  • You must then turn on the Hide Sessions toggle. This must be done for each session that you want related sessions to be turned off for.

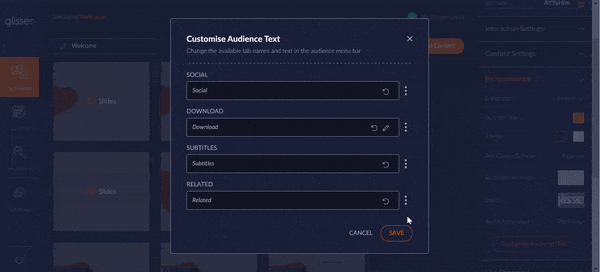
Typically the related tab appears after slides, Q&A, notes and download.

To re-order and rename your related tab, please follow these steps below:

  • Under the Personalisation tab, click on CUSTOMISE AUDIENCE TEXT.
  • Select the hamburger icon to drag and drop the tabs into your desired order.
  • Click on the tab rows to edit the tab title.
  • Click on SAVE.

How increase attendance and reduce cost per attendee?

For more information on how you can use Glisser to increase attendance and reduce cost per attendee, please

How increase attendance and reduce cost per attendee?