The process which you will need to follow is detailed below.
Within a session you need to click on Related Content and turn on Links.
You can then click on Edit Links which then displays a pop up box. You can have up to three related links.
You must fill in the label text and the link. – The label text refers to a concise explanation of the link, for example 1-1 networking. – The link refers to the Grip event link that the delegates will be accessing. – Finally, the style refers to whether you would like the text box to be contained or outlined. It will be displayed in your chosen accent colour.
After filling in the related link box, you must click on SAVE.
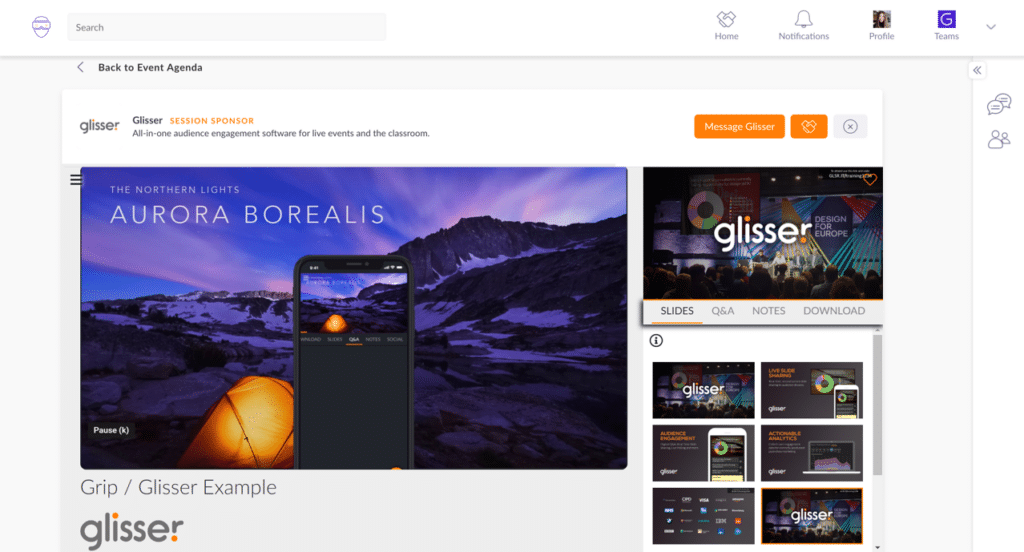
After clicking on Present From Start, the delegates will have the option to click on the link within the sessions that include the link to access Grip. Your session should look like this:
Adding a single session into Grip
Here are the steps for uploading a single session to Grip.
Click on the Glisser session that will be embedded into Grip.
Copy your session URL. For example – glsr.live/IIr2Ysj
Paste the session URL into Grip in session create modal and enable embedding.
Save your changes. Your stream should look like this:
Please note: Single sign on is enabled (SSO). If you would like to capture data within Glisser please set the ID capture to email address.
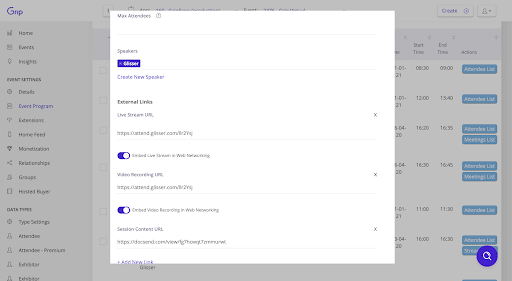
Adding event sessions into Grip
Here are the steps for uploading sessions within an event to Grip.
Click on Events.
Select the correct event and click on Edit Event.
Click on an event slot.
Copy the slot URL (displayed under slot name).
Paste the slot URL into Grip in session create modal and enable embedding.
Follow step 4 and 5 for each slot within your event.
Once changes are saved, your stream should look like this.
Please note: Single sign on is enabled (SSO). If you would like to capture data within Glisser please set the ID capture to email address.
Audience Layout
As a default, all of the sessions in Glisser are created in the flexible format. Flexible is our original responsive approach which switches between desktop, mobile landscape and mobile portrait view depending on the device resolution and orientation. Landscape would lock your session in a desktop view. Portrait will display the mobile portrait view and will default to video rather than slides (if you have both a live stream and slide content). For a consistent view when integrating into Grip, you may opt to use the portrait layout.
To change the audience layout you must:
Click on Personalisation
Click on the Audience Layout drop down and select Portrait view.
You will need to change the audience layout for every session where you would like this to appear.