June 30 Webinar: Crafting the Ultimate RFP for your Webinar

June 30 Webinar: Crafting the Ultimate RFP for your Webinar
Entry listing your Glisser Event is an extra security measure allowing event organizers to limit who can and cannot gain entry into their event, on an individual, or domain level basis.
To entry list your attendees means to allow your attendees access to the event; those not added to the entry list will simply get a red notification saying “You’re not allowed” and won’t allow them access to the event.
You will find the entry list feature in the Data Security section of your event settings on the right-hand side of the screen.
Additional settings refer to the number of times delegates can access your event.
If your event is run as a session in Glisser, then your entry list can not be amended once your session is live. You may at any time edit or update your entry list for an event; however, those who already have access, will not automatically be kicked out if you remove them from the entry list.
Here you will find the section max connection per attendee. This determines how many times a delegate can sign in using their email address.
If you want to set a limit, we recommend setting this to 3 to account for delegates who sign in on multiple devices.
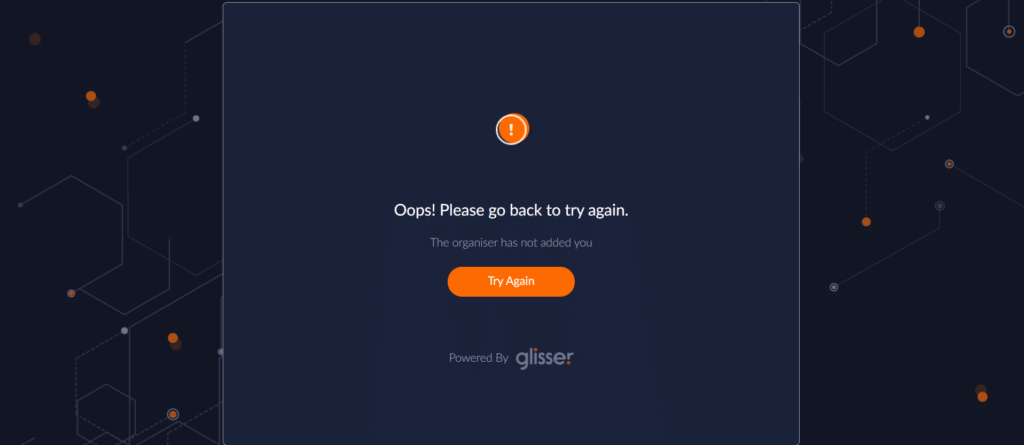
If your attendees try to log in using an email address, social or unique ID that you have not loaded into the entry list, they will be presented with the below page. They would just need to click Try Again and re-enter the correct details.
If you start presenting an event, and any of your attendees have reached the maximum attempts to log into the event, you can always reset the attempts by pressing the reset cap. This can only be used during an ‘event’ in Glisser.
For more information on how you can use Glisser to increase attendance and reduce cost per attendee, please